Wagtail is a new Open Source Django-based CMS. In this 20 minute tutorial we will see how you can create a blog from scratch using Wagtail. If you want to see some more examples of usage please take a look at the wagtaildemo GitHub project.
To follow this tutorial you will need to have Python 2.7 installed with a working version of pip and virtualenv.
Update: The result of this tutorial has been deployed to Heroku: http://gentle-refuge-2590.herokuapp.com/ - you may visit the admin site and login with root / 123 to play with Wagtail! Please don’t do anything naughty !!! Also, notice that because of how Heroku works you won’t be able to upload anything.
Update 08/09/2015: This tutorial has been written during the first days of Wagtail, when documentation and tutorials about it were sparce; right now it should be considered by all accounts obsolete and not be followed! Instead, you should read the official (and very well written) tutorial @ http://docs.wagtail.io/en/latest/getting_started/tutorial.html in the official Wagtail documentation!
Installing the wagtail dependencies
It is recomended to create a new virtual environment that will host the wagtail tutorial. After you have changed to the virtual environment you will need to installl the Wagtail requirements. Create a file named requirements.txt containing the following:
Django==1.6.2
South==1.0.0
django-compressor==1.4
django-modelcluster==0.3
-e git://github.com/torchbox/wagtail.git#egg=wagtail
django-taggit==0.11.2
django-libsass==0.2
and run
pip install -r requirements.txt. If you use Microsoft Windows you will experience problems with Pillow and lxml. Please download the
installation executables from https://pypi.python.org/pypi/Pillow/2.3.0 and https://pypi.python.org/pypi/lxml/3.3.1, install
them using easy_install Pillow-2.3.0.x-py2.7.exe and easy_install lxml-3.3.1.x-py2.7.exe (from inside your virtual environment)
and then install the other requirements. Also please use the latest version of Wagtail (hosted on github) because it has some changes from
the pypi (so don’t do a pip install wagtail).
Warning: Unfortuanately, no official binaries for libsass (which is a django-libsass requirement) are (yet) available for Windows. I have compiled a version for win32 and python 2.7 (which I use) using the instructions found here. You can download this version as a wheel package. Notice that because libsass was compiled with VC Express 2013 you should also install the Visual C++ 2013 redistributable package from Microsoft.
Please use it at your own risk !!!
To install wheels you have to use a version of pip >= 1.4 (so do an easy_install -U pip from your
virtual environment if you have a previous version) and then you can just do a normal pip install libsass-0.3.0-cp27-none-win32.whl.
Warning no2: More unfortuanately, there seem to be a number of issues with how libsass handles @import statements
in Windows. Until this is fixed, Windows users are recommened to use the command line (Ruby) sass compiler. To use it, please
install Ruby in your system and then install sass with gem install sass -v ">=3.3.0alpha" --pre. After that, in the COMPRESS_PRECOMPILERS
setting of your settings.py (discussed in the next section), change the line ('text/x-scss', 'django_libsass.SassCompiler'), to
('text/x-scss', 'sass --scss {infile} {outfile}'),.
Creating and configuring your project
Wagtail has to “live” inside a normal Django project so you now may create a new Django project by issuing:
python <PATH_OF_YOUR_VIRTUAL_ENV>/scripts/django-admin.py startproject wagtailtutorial
If you use Unix you can just run django-admin.py etc however if you try to do the same in windows you
will find out that windows tries to run the .py file with the python executable that is assigned through
explorer (which of course is your main python installation) and not through your path! That’s why
all our commands will be in the form python script.py to make sure that Windows picks the python
executable from your path (which, if you’re inside the virtual enviroment will be the correct one).
Inside the wagtailtutorial folder you will see a file named manage.py and another folder named wagtailtutorial. Inside this wagtailtutorial folder you will find settings.py and urls.py which need to be changed.
Starting with urls.py, remove everything and change it like this:
from django.conf.urls import patterns, include, url
from django.conf.urls.static import static
from django.views.generic.base import RedirectView
from django.contrib import admin
from django.conf import settings
import os.path

from wagtail.wagtailcore import urls as wagtail_urls
from wagtail.wagtailadmin import urls as wagtailadmin_urls
from wagtail.wagtailimages import urls as wagtailimages_urls
from wagtail.wagtailembeds import urls as wagtailembeds_urls
from wagtail.wagtaildocs import admin_urls as wagtaildocs_admin_urls
from wagtail.wagtaildocs import urls as wagtaildocs_urls
from wagtail.wagtailsnippets import urls as wagtailsnippets_urls
from wagtail.wagtailsearch.urls import frontend as wagtailsearch_frontend_urls, admin as wagtailsearch_admin_urls
from wagtail.wagtailusers import urls as wagtailusers_urls
from wagtail.wagtailredirects import urls as wagtailredirects_urls

admin.autodiscover()


# Signal handlers
from wagtail.wagtailsearch import register_signal_handlers as wagtailsearch_register_signal_handlers
wagtailsearch_register_signal_handlers()


urlpatterns = patterns('',
    url(r'^django-admin/', include(admin.site.urls)),

    url(r'^admin/images/', include(wagtailimages_urls)),
    url(r'^admin/embeds/', include(wagtailembeds_urls)),
    url(r'^admin/documents/', include(wagtaildocs_admin_urls)),
    url(r'^admin/snippets/', include(wagtailsnippets_urls)),
    url(r'^admin/search/', include(wagtailsearch_admin_urls)),
    url(r'^admin/users/', include(wagtailusers_urls)),
    url(r'^admin/redirects/', include(wagtailredirects_urls)),
    url(r'^admin/', include(wagtailadmin_urls)),
    url(r'^search/', include(wagtailsearch_frontend_urls)),
    url(r'^documents/', include(wagtaildocs_urls)),

    # For anything not caught by a more specific rule above, hand over to
    # Wagtail's serving mechanism
    url(r'', include(wagtail_urls)),
)


if settings.DEBUG:
    from django.contrib.staticfiles.urls import staticfiles_urlpatterns

    urlpatterns += staticfiles_urlpatterns() # tell gunicorn where static files are in dev mode
    urlpatterns += static(settings.MEDIA_URL + 'images/', document_root=os.path.join(settings.MEDIA_ROOT, 'images'))
You can se that there is a signal handler when a searchable thing is added or changed to handle indexing for search, normal django admin is mapped under /django-admin since /admin is use for Wagtail (of course you may map Wagtail wherever you’d like), inclusion of various wagtail related urls and finally a Wagtail handling everything else. Finally there are some handlers for media and static files.
After that please change your settings.py like this:
# Django settings for wagtailtutorial project.

import os

PROJECT_ROOT = os.path.join(os.path.dirname(__file__), '..', '..')

DEBUG = True
TEMPLATE_DEBUG = DEBUG

ADMINS = ()
MANAGERS = ADMINS

DATABASES = {
    'default': {
        'ENGINE': 'django.db.backends.sqlite3',
        'NAME': PROJECT_ROOT+'/wagtailtutorial.db',
        'USER': '',
        'PASSWORD': '',
        'HOST': '',  # Set to empty string for localhost.
        'PORT': '',  # Set to empty string for default.
    }
}

CONN_MAX_AGE = 600  # number of seconds database connections should persist for
ALLOWED_HOSTS = []
TIME_ZONE = 'Europe/London'
LANGUAGE_CODE = 'en-gb'
SITE_ID = 1
USE_I18N = True
USE_L10N = False
USE_TZ = True
MEDIA_ROOT = os.path.join(PROJECT_ROOT, 'media')
MEDIA_URL = '/media/'
STATIC_ROOT = os.path.join(PROJECT_ROOT, 'static')
STATIC_URL = '/static/'
STATICFILES_DIRS = ()

STATICFILES_FINDERS = (
    'django.contrib.staticfiles.finders.FileSystemFinder',
    'django.contrib.staticfiles.finders.AppDirectoriesFinder',
    'compressor.finders.CompressorFinder',
)

SECRET_KEY = 'wq21wtjo3@d_qfjvd-#td!%7gfy2updj2z+nev^k$iy%=m4_tr'

TEMPLATE_LOADERS = (
    'django.template.loaders.filesystem.Loader',
    'django.template.loaders.app_directories.Loader',
)

MIDDLEWARE_CLASSES = (
    'django.middleware.common.CommonMiddleware',
    'django.contrib.sessions.middleware.SessionMiddleware',
    'django.middleware.csrf.CsrfViewMiddleware',
    'django.contrib.auth.middleware.AuthenticationMiddleware',
    'django.contrib.messages.middleware.MessageMiddleware',
    'django.middleware.clickjacking.XFrameOptionsMiddleware',
    'wagtail.wagtailcore.middleware.SiteMiddleware',
    'wagtail.wagtailredirects.middleware.RedirectMiddleware',
)

from django.conf import global_settings
TEMPLATE_CONTEXT_PROCESSORS = global_settings.TEMPLATE_CONTEXT_PROCESSORS + (
    'django.core.context_processors.request',
)

ROOT_URLCONF = 'wagtailtutorial.urls'
WSGI_APPLICATION = 'wagtailtutorial.wsgi.application'
TEMPLATE_DIRS = ()

INSTALLED_APPS = (
    'django.contrib.auth',
    'django.contrib.contenttypes',
    'django.contrib.sessions',
    # 'django.contrib.sites',  # Wagtail uses its own site management logic
    'django.contrib.messages',
    'django.contrib.staticfiles',

    'south',
    'compressor',
    'taggit',
    'modelcluster',
    'django.contrib.admin',

    'wagtail.wagtailcore',
    'wagtail.wagtailadmin',
    'wagtail.wagtaildocs',
    'wagtail.wagtailsnippets',
    'wagtail.wagtailusers',
    'wagtail.wagtailimages',
    'wagtail.wagtailembeds',
    'wagtail.wagtailsearch',
    'wagtail.wagtailredirects',

    'tutorial',
)

EMAIL_SUBJECT_PREFIX = '[wagtailtutorial] '

INTERNAL_IPS = ('127.0.0.1', '10.0.2.2')

COMPRESS_PRECOMPILERS = (
    ('text/x-scss', 'django_libsass.SassCompiler'),
)

# Auth settings
LOGIN_URL = 'django.contrib.auth.views.login'
LOGIN_REDIRECT_URL = 'wagtailadmin_home'

LOGGING = {
    'version': 1,
    'disable_existing_loggers': False,
    'filters': {
        'require_debug_false': {
            '()': 'django.utils.log.RequireDebugFalse'
        }
    },
    'handlers': {
        'mail_admins': {
            'level': 'ERROR',
            'filters': ['require_debug_false'],
            'class': 'django.utils.log.AdminEmailHandler'
        }
    },
    'loggers': {
        'django.request': {
            'handlers': ['mail_admins'],
            'level': 'ERROR',
            'propagate': True,
        },
    }
}


# WAGTAIL SETTINGS
WAGTAIL_SITE_NAME = 'wagtailtutorial'

# Override the search results template for wagtailsearch
WAGTAILSEARCH_RESULTS_TEMPLATE = 'tutorial/search_results.html'
WAGTAILSEARCH_RESULTS_TEMPLATE_AJAX = 'tutorial/includes/search_listing.html'

WAGTAILSEARCH_ES_INDEX = 'wagtailtutorial'
The most important thing to notice is that the INSTALLED_APPS contains the usual apps from django.*, south for database migrations, django-compressor to support compressing static files (and automatic translating from less to css), django-taggit to add support for tags, and django-modelcluster which adds support from clusters (groups) of models. It also contains the wagtail.* applications and the tutorial application which is where we will create our blog. Also there are two Wagtail related middleware (one to add a site attribute to each request and one to hand redirects), configuring django-compressor to use django_libsass to compile less files, and some other, not so important Wagtail settings.
So let’s create the missing tutorial application by issuing:
python manage.py startapp tutorial
Now we’ll have a tutorial folder waiting to define our blog structure inside the wagtailtutorial folder!
Checking to see if everything works
Before continuing with our blog creation let’s make sure that everything works, first of all by generating the database schema:
python manage.py syncdb
In the superuser question answer yes and add a superuser. Then you can run the migrations - however because there are some problems with the way SQLite3 runs migrations it is recommended to run the migrations in two steps:
python manage.py migrate 0001 --all
python manage.py migrate
Finally, you now may try a
python manage.py runserver
and visit http://127.0.0.1:8000. If everything worked fine you will get a
Welcome to your new Wagtail site!
page — congratulations !
The homepage is rather simple (for now!) but you may already navigate to http://127.0.0.1:8000/admin and from there, login to Wagtail admin with the superuser you created earlier. Now you may start experiencing Wagtail !
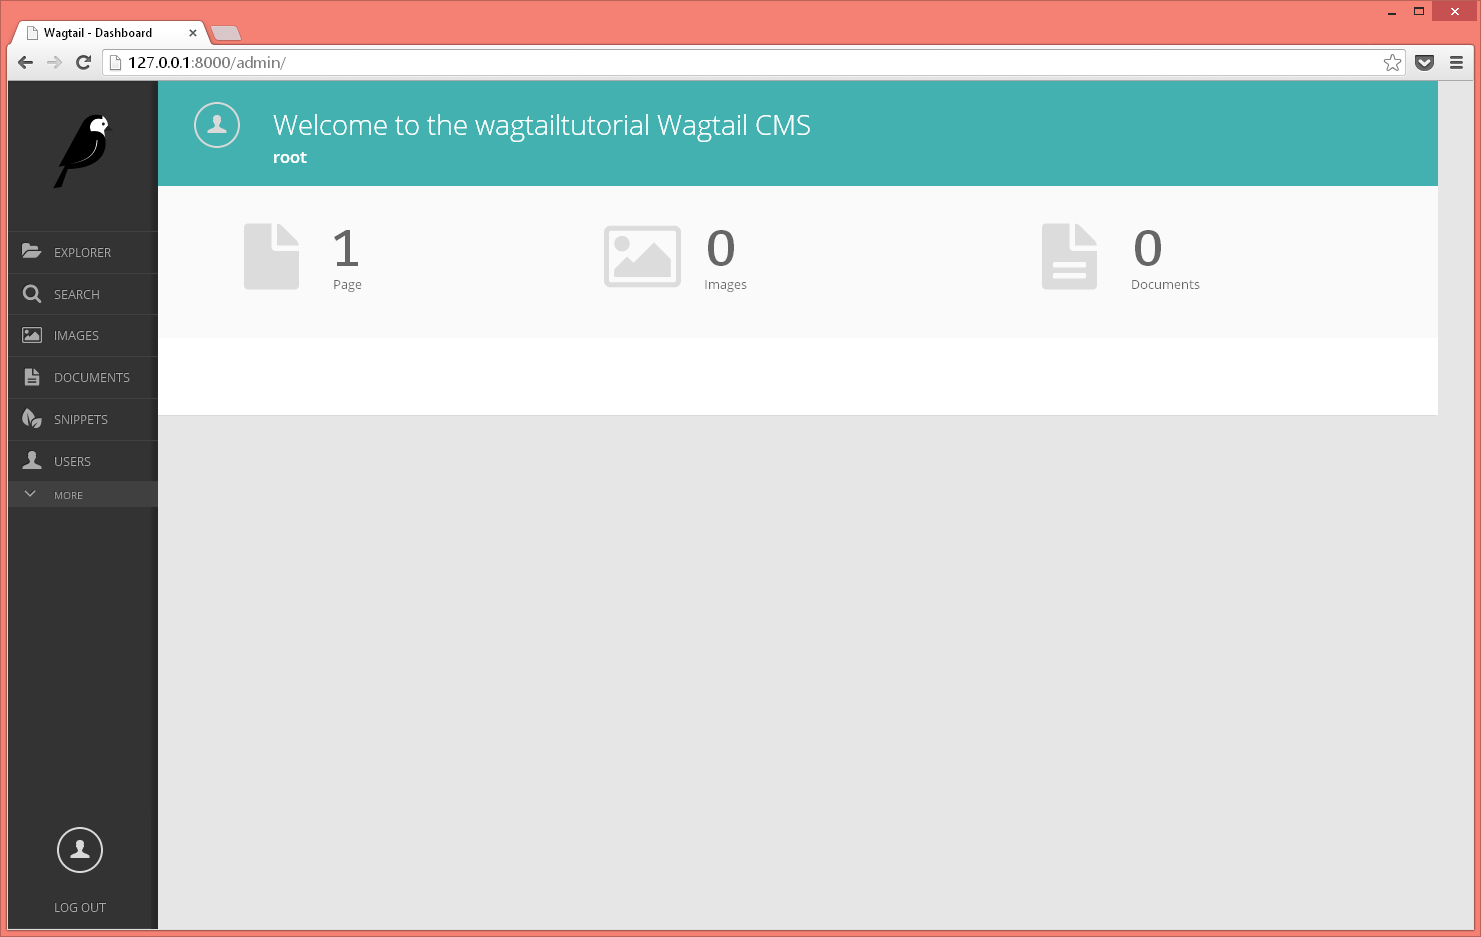
Exploring Wagtail admin
When you login to Wagtail admin you will see a menu at the left with the options:
- Explorer is used to actually manage the content of your site
- Search is used for searching through your content
- Images is used to manage your images
- Documents is used to manage your Documents
- Snippets is used for side bars etc
- Users is used for User management
- Redirects is used to redirect to a specific page
- Editors picks is used to promote search results
Of the previous, the one needing more explanation is Explorer: Clicking it you will see that a label named “Welcome to your Wagtail site!” will open. This is the root Page of your site. If you click at it you will go to the actions of this page. The actions you can do here is: - Add Child Page - Edit - View Live - Move - Delete - Unpublish
The Pages (and more generally the Content) of Wagtail are Django Models that are saved through a Tree hierarchy. However, if you click “Add Child Page” you won’t be able to add anything because you must create your own Page types (we will see how it is done in the next section).
When you click edit you will be able to edit the parts of the page (each part is a normal Field of the model). Also, you will see that the form is split into two tabs: Content and Promote. In the Content for instance you will see that the “Welcome to your Wagtail site!” has only a “Title” CharField. These are the fields that will be available to all Pages since “Welcome to your Wagtail site!” has a class of Page from which every other page should inherit. After you finish editing a page you may save it as a draft, publish, sent it for moderation (if you don’t have the rights to publish it) etc.
Creating our blog
Each of our Page types is a normal Django Model which inherits from Page. Let’s suppose that our posts should contain a title, a body and a created date. Add the following to tutorials/models.py:
from django.db import models

from wagtail.wagtailcore.models import Page
from wagtail.wagtailcore.fields import RichTextField
from wagtail.wagtailadmin.edit_handlers import FieldPanel

class BlogPage(Page):
    body = RichTextField()
    date = models.DateField("Post date")
    search_name = "Blog Page"

    indexed_fields = ('body', )

BlogPage.content_panels = [
    FieldPanel('title', classname="full title"),
    FieldPanel('date'),
    FieldPanel('body', classname="full"),
]
and run python manage.py syncdb to create the tutorial_blogpage table.
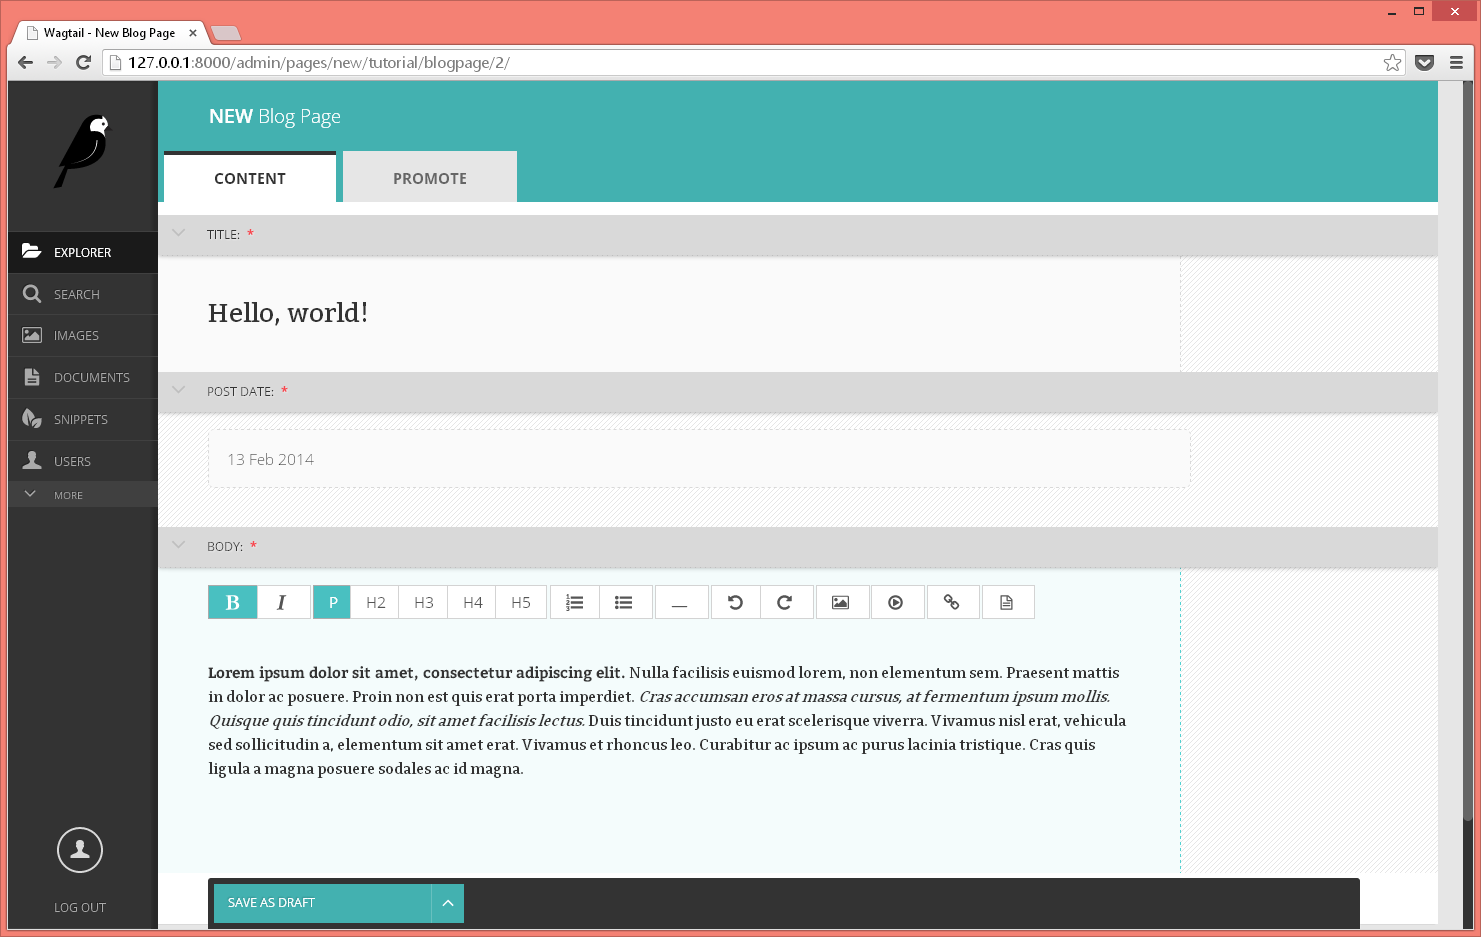
Now, if you visit again the /admin and click on the “Add Child Page” action of “Welcome to your new Wagtail Site!” you will see the “Blog Page” page and after you click it you will be able to see a form with the Fields you defined and title(title, body, date). The title is a field inherited from Page, along with the fields in the Promote tab.
In our declaration of BlogPage we added three FieldPanels on its content_panes. A FieldPanel is a special edit handler for each Field. That is why when you try to edit the body you will see a rich text toolbar that enables you to not only format text but also embed images, documents and even oembed links. If you hadn’t included the FieldPanel('body', classname="full") then you wouldn’t see the rich text editor.
So now we can add as many posts as we like!
The time has come to take a look at our fine blog post: After we publish our page we click to the view live action and…
TemplateDoesNotExist at /hello-world/
tutorial/blog_page.html
:(
A template seems to be missing — actually we have totally forgotten about the presentation of our blog — we’ll talk about this in the next section !
However, before going there we should also create an Index page type collecting our posts.
For this, we will change our models.py to this:
from django.db import models

from wagtail.wagtailcore.models import Page, Orderable
from wagtail.wagtailcore.fields import RichTextField
from wagtail.wagtailadmin.edit_handlers import FieldPanel  ,MultiFieldPanel,InlinePanel, PageChooserPanel
from modelcluster.fields import ParentalKey

class BlogPage(Page):
    body = RichTextField()
    date = models.DateField("Post date")
    indexed_fields = ('body', )
    search_name = "Blog Page"

BlogPage.content_panels = [
    FieldPanel('title', classname="full title"),
    FieldPanel('date'),
    FieldPanel('body', classname="full"),
]


class LinkFields(models.Model):
    link_page = models.ForeignKey(
        'wagtailcore.Page',
        null=True,
        blank=True,
        related_name='+'
    )

    panels = [
        PageChooserPanel('link_page'),
    ]

    class Meta:
        abstract = True

class RelatedLink(LinkFields):
    title = models.CharField(max_length=255, help_text="Link title")
    panels = [
        FieldPanel('title'),
        MultiFieldPanel(LinkFields.panels, "Link"),
    ]

    class Meta:
        abstract = True


class BlogIndexPageRelatedLink(Orderable, RelatedLink):
    page = ParentalKey('tutorial.BlogIndexPage', related_name='related_links')

class BlogIndexPage(Page):
    intro = models.CharField(max_length=256)
    indexed_fields = ('body', )
    search_name = "Blog Index Page"

BlogIndexPage.content_panels = [
    FieldPanel('title', classname="full title"),
    FieldPanel('intro', classname="full"),
    InlinePanel(BlogIndexPage, 'related_links', label="Related links"),
]
The above adds a way to put related_links to a BlogIndexPage — these related_links are the BlogPages that actually belong to the blog - so now, we can add a blog index page and add all our blog posts to it!
Now that we’ve created the BlogPage and BlogIndexPage pages it’s time to take a look at how we will actually display our blog…
Creating templates for Pages
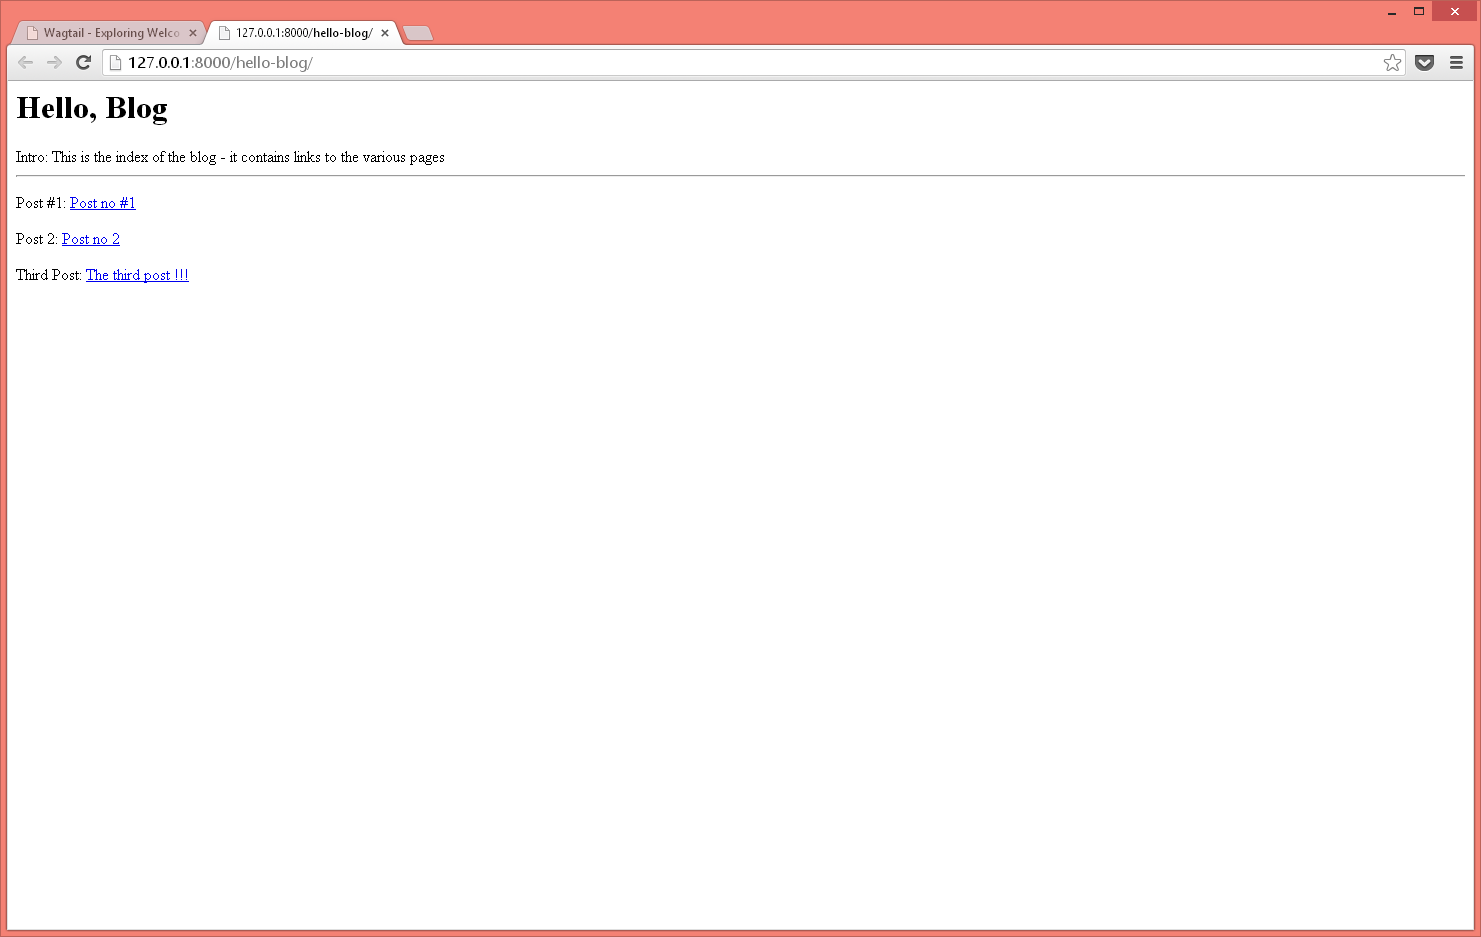
A normal Django template can be used to display each page type. Wagtail either generates automatically (by seperating underscors with capital letters in camelcase for instance BlogIndexPage -> blog_index_page) or you can use the template class attribute. Let’s add a templates foler within the tutorial foler and add another folder named tutorial inside templates and ten add a file named blog_index_page.html to templates with the following content (you must have the following hierarchy wagtailtutorial/tutorial/templates/tutorial/blog_index_page.html):
<html>
<body>
    <h1>{{ self.title }}</h1>
        Intro: {{ self.intro }}
        <hr />
        {% for rl in self.related_links.all %}
            <p>{{ rl.title }}: <a href='{{ rl.link_page.url }}'>{{ rl.link_page }}</a></p>
        {% endfor %}
    </body>
</html>
So self is the context name of the BlogPageIndex instance that is used to render this page. Beyond that, it’s normal django.
Now you can view your Blog Index — however before clicking on a link to also view your posts add the template for your BlogPost (tutorial/blog_page.html):
{% load rich_text %}
<html>
<body>
    <h1>{{ self.title }}</h1>
        Date: {{ self.date }}
        {{ self.body | richtext }}
    </body>
</html>
The extra thing here is the richtext filter which renders a RichTextField correctly. Of course the above templates are just examples - check wagtaildemo for a much better template design.
Woo-hoo — now I can totally start blogging !!! \o/
…
…
But … when I go to 127.0.0.1:8000 it displays the ugly “Welcome to your new Wagtail site!”. I don’t want to see that any more !!!
No problemo - check the next section of the tutorial :)
Changing your home page
Wagtail uses the concept of sites to define groups of pages hosted in the same server. To make more clear what site is, you have to use the good old django admin which can be found at http://127.0.0.1:8000/django-admin/. Check the localhost[default] site entry: You will see that each site has a name, a root page (currently the “Welcome to your new Wagtail site!”) and an is_default check. So, change the root page of the localhost site to your BlogIndexPage and go to http://127.0.0.1:8000/ … Yes ! The blog is alive :)
Where to go from here
You are now ready to start adding more pages to your blog, adding functionality to it (don’t forget that everything is just Django models and templates so you can change it at will), or even creating a completely different kind of site by adding other Page types. For a more complete site with lots of examples please check wagtaildemo. There is no complete documentation yet however you can
Use the source Luke!