/var/

Various programming stuff

Hello! If you are using an ad blocker but find something useful here and want to support me please consider disabling your ad blocker for this site.

Thank you,
Serafeim

A Wagtail tutorial

Wagtail is a new Open Source Django-based CMS. In this 20 minute tutorial we will see how you can create a blog from scratch using Wagtail. If you want to see some more examples of usage please take a look at the wagtaildemo GitHub project.

To follow this tutorial you will need to have Python 2.7 installed with a working version of pip and virtualenv.

Update: The result of this tutorial has been deployed to Heroku: http://gentle-refuge-2590.herokuapp.com/ - you may visit the admin site and login with root / 123 to play with Wagtail! Please don’t do anything naughty !!! Also, notice that because of how Heroku works you won’t be able to upload anything.

Update 08/09/2015: This tutorial has been written during the first days of Wagtail, when documentation and tutorials about it were sparce; right now it should be considered by all accounts obsolete and not be followed! Instead, you should read the official (and very well written) tutorial @ http://docs.wagtail.io/en/latest/getting_started/tutorial.html in the official Wagtail documentation!

Installing the wagtail dependencies

It is recomended to create a new virtual environment that will host the wagtail tutorial. After you have changed to the virtual environment you will need to installl the Wagtail requirements. Create a file named requirements.txt containing the following:

Django==1.6.2
South==1.0.0
django-compressor==1.4
django-modelcluster==0.3
-e git://github.com/torchbox/wagtail.git#egg=wagtail
django-taggit==0.11.2
django-libsass==0.2

and run pip install -r requirements.txt. If you use Microsoft Windows you will experience problems with Pillow and lxml. Please download the installation executables from https://pypi.python.org/pypi/Pillow/2.3.0 and https://pypi.python.org/pypi/lxml/3.3.1, install them using easy_install Pillow-2.3.0.x-py2.7.exe and easy_install lxml-3.3.1.x-py2.7.exe (from inside your virtual environment) and then install the other requirements. Also please use the latest version of Wagtail (hosted on github) because it has some changes from the pypi (so don’t do a pip install wagtail).

Warning: Unfortuanately, no official binaries for libsass (which is a django-libsass requirement) are (yet) available for Windows. I have compiled a version for win32 and python 2.7 (which I use) using the instructions found here. You can download this version as a wheel package. Notice that because libsass was compiled with VC Express 2013 you should also install the Visual C++ 2013 redistributable package from Microsoft.

Please use it at your own risk !!!

To install wheels you have to use a version of pip >= 1.4 (so do an easy_install -U pip from your virtual environment if you have a previous version) and then you can just do a normal pip install libsass-0.3.0-cp27-none-win32.whl.

Warning no2: More unfortuanately, there seem to be a number of issues with how libsass handles @import statements in Windows. Until this is fixed, Windows users are recommened to use the command line (Ruby) sass compiler. To use it, please install Ruby in your system and then install sass with gem install sass -v ">=3.3.0alpha" --pre. After that, in the COMPRESS_PRECOMPILERS setting of your settings.py (discussed in the next section), change the line ('text/x-scss', 'django_libsass.SassCompiler'), to ('text/x-scss', 'sass --scss {infile} {outfile}'),.

Creating and configuring your project

Wagtail has to “live” inside a normal Django project so you now may create a new Django project by issuing:

python <PATH_OF_YOUR_VIRTUAL_ENV>/scripts/django-admin.py startproject wagtailtutorial

If you use Unix you can just run django-admin.py etc however if you try to do the same in windows you will find out that windows tries to run the .py file with the python executable that is assigned through explorer (which of course is your main python installation) and not through your path! That’s why all our commands will be in the form python script.py to make sure that Windows picks the python executable from your path (which, if you’re inside the virtual enviroment will be the correct one).

Inside the wagtailtutorial folder you will see a file named manage.py and another folder named wagtailtutorial. Inside this wagtailtutorial folder you will find settings.py and urls.py which need to be changed.

Starting with urls.py, remove everything and change it like this:

from django.conf.urls import patterns, include, url
from django.conf.urls.static import static
from django.views.generic.base import RedirectView
from django.contrib import admin
from django.conf import settings
import os.path

from wagtail.wagtailcore import urls as wagtail_urls
from wagtail.wagtailadmin import urls as wagtailadmin_urls
from wagtail.wagtailimages import urls as wagtailimages_urls
from wagtail.wagtailembeds import urls as wagtailembeds_urls
from wagtail.wagtaildocs import admin_urls as wagtaildocs_admin_urls
from wagtail.wagtaildocs import urls as wagtaildocs_urls
from wagtail.wagtailsnippets import urls as wagtailsnippets_urls
from wagtail.wagtailsearch.urls import frontend as wagtailsearch_frontend_urls, admin as wagtailsearch_admin_urls
from wagtail.wagtailusers import urls as wagtailusers_urls
from wagtail.wagtailredirects import urls as wagtailredirects_urls

admin.autodiscover()


# Signal handlers
from wagtail.wagtailsearch import register_signal_handlers as wagtailsearch_register_signal_handlers
wagtailsearch_register_signal_handlers()


urlpatterns = patterns('',
    url(r'^django-admin/', include(admin.site.urls)),

    url(r'^admin/images/', include(wagtailimages_urls)),
    url(r'^admin/embeds/', include(wagtailembeds_urls)),
    url(r'^admin/documents/', include(wagtaildocs_admin_urls)),
    url(r'^admin/snippets/', include(wagtailsnippets_urls)),
    url(r'^admin/search/', include(wagtailsearch_admin_urls)),
    url(r'^admin/users/', include(wagtailusers_urls)),
    url(r'^admin/redirects/', include(wagtailredirects_urls)),
    url(r'^admin/', include(wagtailadmin_urls)),
    url(r'^search/', include(wagtailsearch_frontend_urls)),
    url(r'^documents/', include(wagtaildocs_urls)),

    # For anything not caught by a more specific rule above, hand over to
    # Wagtail's serving mechanism
    url(r'', include(wagtail_urls)),
)


if settings.DEBUG:
    from django.contrib.staticfiles.urls import staticfiles_urlpatterns

    urlpatterns += staticfiles_urlpatterns() # tell gunicorn where static files are in dev mode
    urlpatterns += static(settings.MEDIA_URL + 'images/', document_root=os.path.join(settings.MEDIA_ROOT, 'images'))

You can se that there is a signal handler when a searchable thing is added or changed to handle indexing for search, normal django admin is mapped under /django-admin since /admin is use for Wagtail (of course you may map Wagtail wherever you’d like), inclusion of various wagtail related urls and finally a Wagtail handling everything else. Finally there are some handlers for media and static files.

After that please change your settings.py like this:

# Django settings for wagtailtutorial project.

import os

PROJECT_ROOT = os.path.join(os.path.dirname(__file__), '..', '..')

DEBUG = True
TEMPLATE_DEBUG = DEBUG

ADMINS = ()
MANAGERS = ADMINS

DATABASES = {
    'default': {
        'ENGINE': 'django.db.backends.sqlite3',
        'NAME': PROJECT_ROOT+'/wagtailtutorial.db',
        'USER': '',
        'PASSWORD': '',
        'HOST': '',  # Set to empty string for localhost.
        'PORT': '',  # Set to empty string for default.
    }
}

CONN_MAX_AGE = 600  # number of seconds database connections should persist for
ALLOWED_HOSTS = []
TIME_ZONE = 'Europe/London'
LANGUAGE_CODE = 'en-gb'
SITE_ID = 1
USE_I18N = True
USE_L10N = False
USE_TZ = True
MEDIA_ROOT = os.path.join(PROJECT_ROOT, 'media')
MEDIA_URL = '/media/'
STATIC_ROOT = os.path.join(PROJECT_ROOT, 'static')
STATIC_URL = '/static/'
STATICFILES_DIRS = ()

STATICFILES_FINDERS = (
    'django.contrib.staticfiles.finders.FileSystemFinder',
    'django.contrib.staticfiles.finders.AppDirectoriesFinder',
    'compressor.finders.CompressorFinder',
)

SECRET_KEY = 'wq21wtjo3@d_qfjvd-#td!%7gfy2updj2z+nev^k$iy%=m4_tr'

TEMPLATE_LOADERS = (
    'django.template.loaders.filesystem.Loader',
    'django.template.loaders.app_directories.Loader',
)

MIDDLEWARE_CLASSES = (
    'django.middleware.common.CommonMiddleware',
    'django.contrib.sessions.middleware.SessionMiddleware',
    'django.middleware.csrf.CsrfViewMiddleware',
    'django.contrib.auth.middleware.AuthenticationMiddleware',
    'django.contrib.messages.middleware.MessageMiddleware',
    'django.middleware.clickjacking.XFrameOptionsMiddleware',
    'wagtail.wagtailcore.middleware.SiteMiddleware',
    'wagtail.wagtailredirects.middleware.RedirectMiddleware',
)

from django.conf import global_settings
TEMPLATE_CONTEXT_PROCESSORS = global_settings.TEMPLATE_CONTEXT_PROCESSORS + (
    'django.core.context_processors.request',
)

ROOT_URLCONF = 'wagtailtutorial.urls'
WSGI_APPLICATION = 'wagtailtutorial.wsgi.application'
TEMPLATE_DIRS = ()

INSTALLED_APPS = (
    'django.contrib.auth',
    'django.contrib.contenttypes',
    'django.contrib.sessions',
    # 'django.contrib.sites',  # Wagtail uses its own site management logic
    'django.contrib.messages',
    'django.contrib.staticfiles',

    'south',
    'compressor',
    'taggit',
    'modelcluster',
    'django.contrib.admin',

    'wagtail.wagtailcore',
    'wagtail.wagtailadmin',
    'wagtail.wagtaildocs',
    'wagtail.wagtailsnippets',
    'wagtail.wagtailusers',
    'wagtail.wagtailimages',
    'wagtail.wagtailembeds',
    'wagtail.wagtailsearch',
    'wagtail.wagtailredirects',

    'tutorial',
)

EMAIL_SUBJECT_PREFIX = '[wagtailtutorial] '

INTERNAL_IPS = ('127.0.0.1', '10.0.2.2')

COMPRESS_PRECOMPILERS = (
    ('text/x-scss', 'django_libsass.SassCompiler'),
)

# Auth settings
LOGIN_URL = 'django.contrib.auth.views.login'
LOGIN_REDIRECT_URL = 'wagtailadmin_home'

LOGGING = {
    'version': 1,
    'disable_existing_loggers': False,
    'filters': {
        'require_debug_false': {
            '()': 'django.utils.log.RequireDebugFalse'
        }
    },
    'handlers': {
        'mail_admins': {
            'level': 'ERROR',
            'filters': ['require_debug_false'],
            'class': 'django.utils.log.AdminEmailHandler'
        }
    },
    'loggers': {
        'django.request': {
            'handlers': ['mail_admins'],
            'level': 'ERROR',
            'propagate': True,
        },
    }
}


# WAGTAIL SETTINGS
WAGTAIL_SITE_NAME = 'wagtailtutorial'

# Override the search results template for wagtailsearch
WAGTAILSEARCH_RESULTS_TEMPLATE = 'tutorial/search_results.html'
WAGTAILSEARCH_RESULTS_TEMPLATE_AJAX = 'tutorial/includes/search_listing.html'

WAGTAILSEARCH_ES_INDEX = 'wagtailtutorial'

The most important thing to notice is that the INSTALLED_APPS contains the usual apps from django.*, south for database migrations, django-compressor to support compressing static files (and automatic translating from less to css), django-taggit to add support for tags, and django-modelcluster which adds support from clusters (groups) of models. It also contains the wagtail.* applications and the tutorial application which is where we will create our blog. Also there are two Wagtail related middleware (one to add a site attribute to each request and one to hand redirects), configuring django-compressor to use django_libsass to compile less files, and some other, not so important Wagtail settings.

So let’s create the missing tutorial application by issuing:

python manage.py startapp tutorial

Now we’ll have a tutorial folder waiting to define our blog structure inside the wagtailtutorial folder!

Checking to see if everything works

Before continuing with our blog creation let’s make sure that everything works, first of all by generating the database schema:

python manage.py syncdb

In the superuser question answer yes and add a superuser. Then you can run the migrations - however because there are some problems with the way SQLite3 runs migrations it is recommended to run the migrations in two steps:

python manage.py migrate 0001 --all
python manage.py migrate

Finally, you now may try a

python manage.py runserver

and visit http://127.0.0.1:8000. If everything worked fine you will get a

Welcome to your new Wagtail site!

page — congratulations !

The homepage is rather simple (for now!) but you may already navigate to http://127.0.0.1:8000/admin and from there, login to Wagtail admin with the superuser you created earlier. Now you may start experiencing Wagtail !
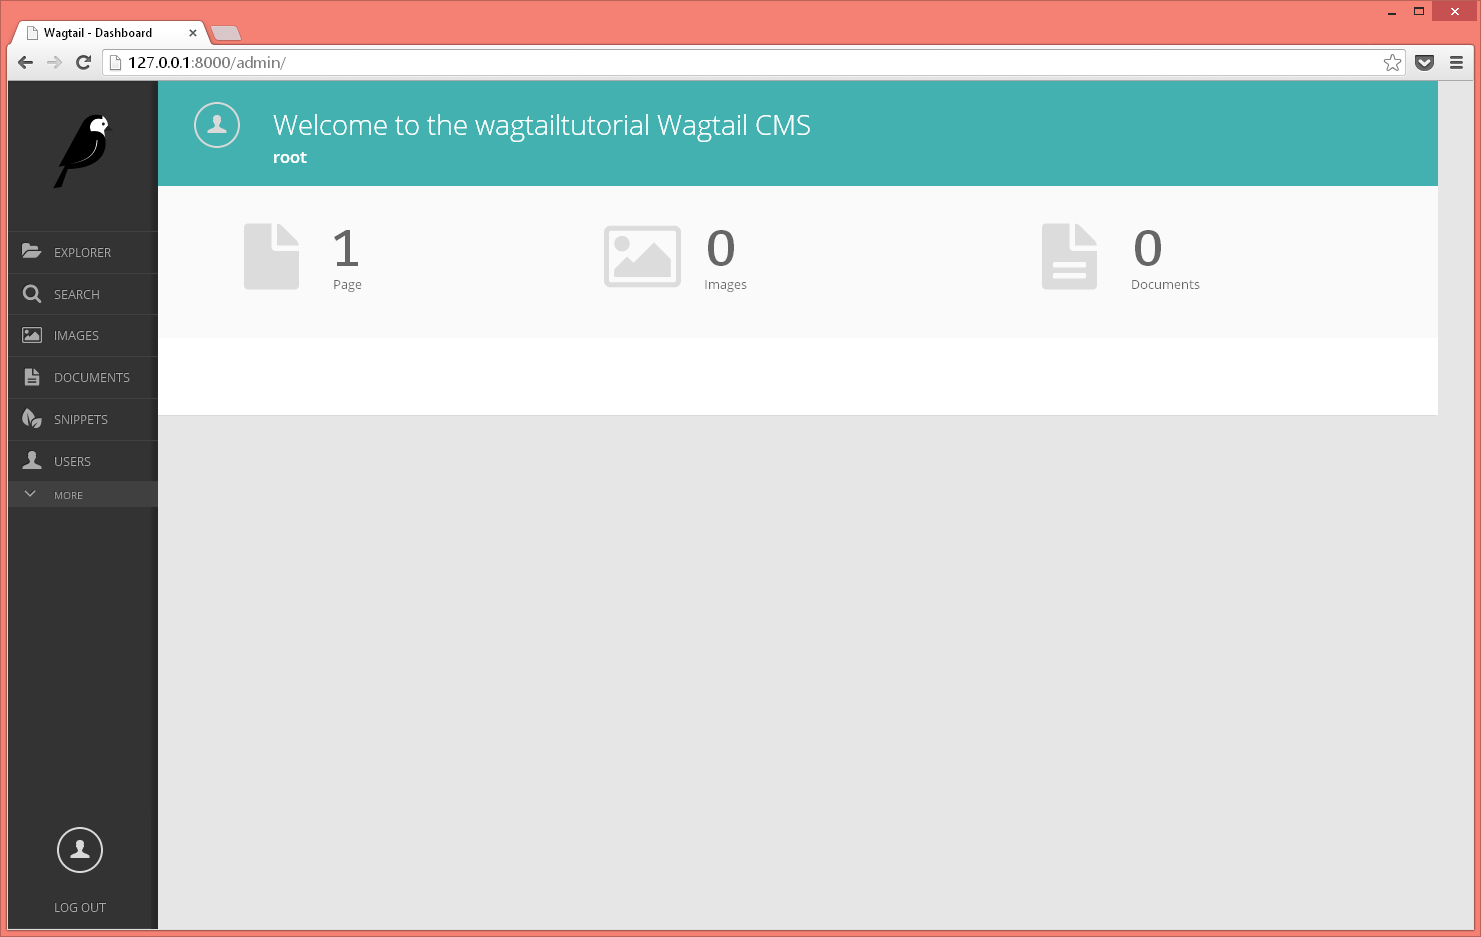
Wagtail admin index

Exploring Wagtail admin

When you login to Wagtail admin you will see a menu at the left with the options:

  • Explorer is used to actually manage the content of your site
  • Search is used for searching through your content
  • Images is used to manage your images
  • Documents is used to manage your Documents
  • Snippets is used for side bars etc
  • Users is used for User management
  • Redirects is used to redirect to a specific page
  • Editors picks is used to promote search results

Of the previous, the one needing more explanation is Explorer: Clicking it you will see that a label named “Welcome to your Wagtail site!” will open. This is the root Page of your site. If you click at it you will go to the actions of this page. The actions you can do here is: - Add Child Page - Edit - View Live - Move - Delete - Unpublish

The Pages (and more generally the Content) of Wagtail are Django Models that are saved through a Tree hierarchy. However, if you click “Add Child Page” you won’t be able to add anything because you must create your own Page types (we will see how it is done in the next section).

When you click edit you will be able to edit the parts of the page (each part is a normal Field of the model). Also, you will see that the form is split into two tabs: Content and Promote. In the Content for instance you will see that the “Welcome to your Wagtail site!” has only a “Title” CharField. These are the fields that will be available to all Pages since “Welcome to your Wagtail site!” has a class of Page from which every other page should inherit. After you finish editing a page you may save it as a draft, publish, sent it for moderation (if you don’t have the rights to publish it) etc.

Creating our blog

Each of our Page types is a normal Django Model which inherits from Page. Let’s suppose that our posts should contain a title, a body and a created date. Add the following to tutorials/models.py:

from django.db import models

from wagtail.wagtailcore.models import Page
from wagtail.wagtailcore.fields import RichTextField
from wagtail.wagtailadmin.edit_handlers import FieldPanel    

class BlogPage(Page):
    body = RichTextField()
    date = models.DateField("Post date")
    search_name = "Blog Page"

    indexed_fields = ('body', )

BlogPage.content_panels = [
    FieldPanel('title', classname="full title"),
    FieldPanel('date'),
    FieldPanel('body', classname="full"),
]

and run python manage.py syncdb to create the tutorial_blogpage table.

Now, if you visit again the /admin and click on the “Add Child Page” action of “Welcome to your new Wagtail Site!” you will see the “Blog Page” page and after you click it you will be able to see a form with the Fields you defined and title(title, body, date). The title is a field inherited from Page, along with the fields in the Promote tab.

In our declaration of BlogPage we added three FieldPanels on its content_panes. A FieldPanel is a special edit handler for each Field. That is why when you try to edit the body you will see a rich text toolbar that enables you to not only format text but also embed images, documents and even oembed links. If you hadn’t included the FieldPanel('body', classname="full") then you wouldn’t see the rich text editor.
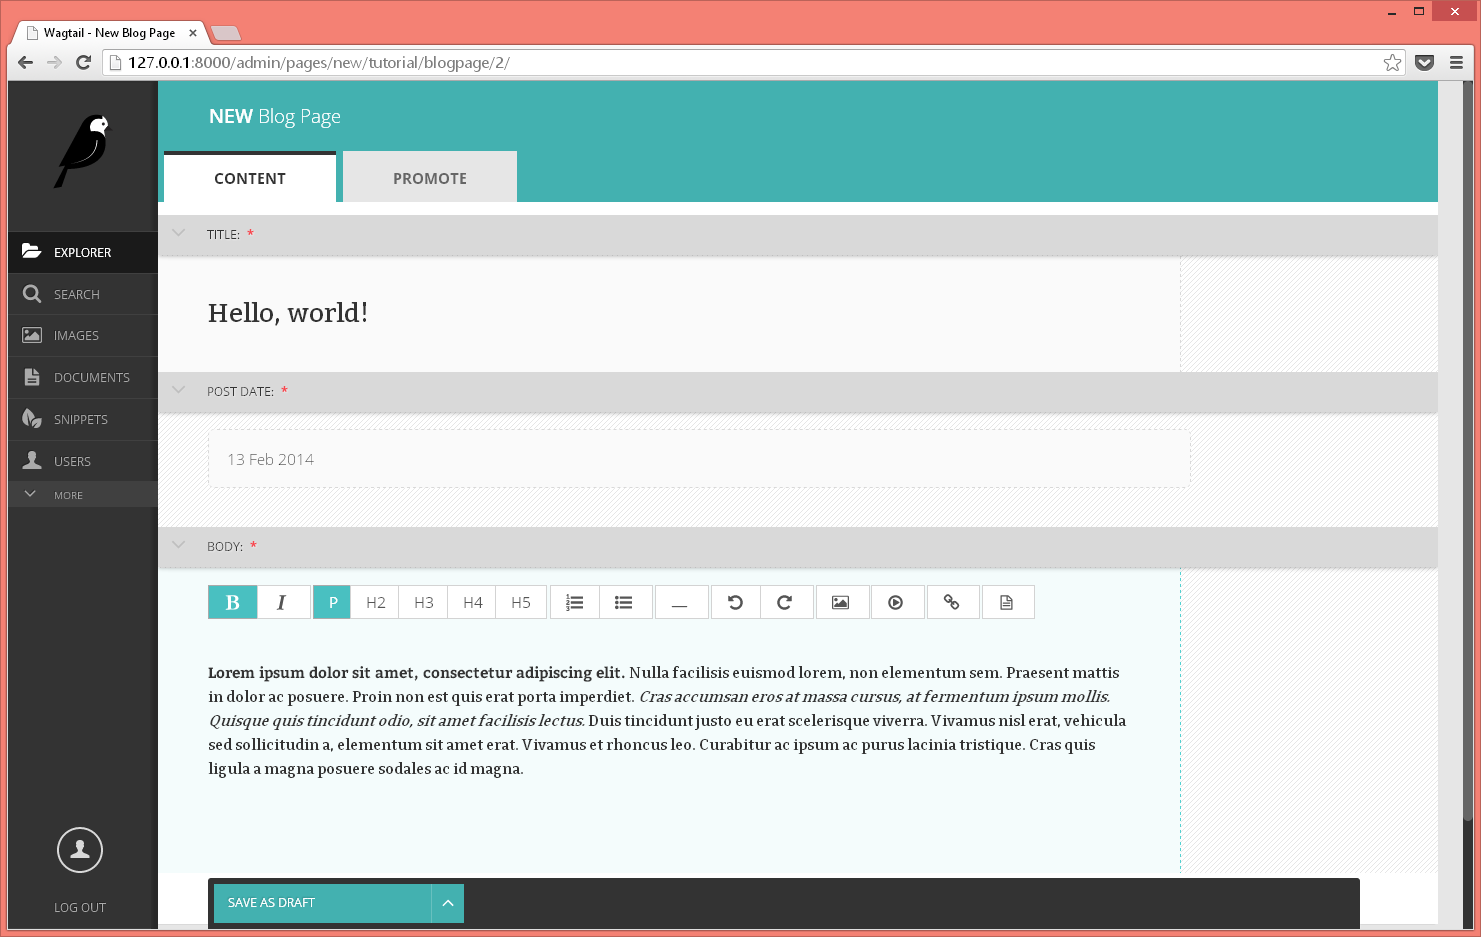
Editing pages in Wagtail

So now we can add as many posts as we like!

The time has come to take a look at our fine blog post: After we publish our page we click to the view live action and…

TemplateDoesNotExist at /hello-world/

tutorial/blog_page.html

:(

A template seems to be missing — actually we have totally forgotten about the presentation of our blog — we’ll talk about this in the next section !

However, before going there we should also create an Index page type collecting our posts.

For this, we will change our models.py to this:

from django.db import models

from wagtail.wagtailcore.models import Page, Orderable
from wagtail.wagtailcore.fields import RichTextField
from wagtail.wagtailadmin.edit_handlers import FieldPanel  ,MultiFieldPanel,InlinePanel, PageChooserPanel
from modelcluster.fields import ParentalKey

class BlogPage(Page):
    body = RichTextField()
    date = models.DateField("Post date")
    indexed_fields = ('body', )
    search_name = "Blog Page"

BlogPage.content_panels = [
    FieldPanel('title', classname="full title"),
    FieldPanel('date'),
    FieldPanel('body', classname="full"),
]


class LinkFields(models.Model):
    link_page = models.ForeignKey(
        'wagtailcore.Page',
        null=True,
        blank=True,
        related_name='+'
    )

    panels = [
        PageChooserPanel('link_page'),
    ]

    class Meta:
        abstract = True

class RelatedLink(LinkFields):
    title = models.CharField(max_length=255, help_text="Link title")
    panels = [
        FieldPanel('title'),
        MultiFieldPanel(LinkFields.panels, "Link"),
    ]

    class Meta:
        abstract = True


class BlogIndexPageRelatedLink(Orderable, RelatedLink):
    page = ParentalKey('tutorial.BlogIndexPage', related_name='related_links')

class BlogIndexPage(Page):
    intro = models.CharField(max_length=256)
    indexed_fields = ('body', )
    search_name = "Blog Index Page"

BlogIndexPage.content_panels = [
    FieldPanel('title', classname="full title"),
    FieldPanel('intro', classname="full"),
    InlinePanel(BlogIndexPage, 'related_links', label="Related links"),
]    

The above adds a way to put related_links to a BlogIndexPage — these related_links are the BlogPages that actually belong to the blog - so now, we can add a blog index page and add all our blog posts to it!

Now that we’ve created the BlogPage and BlogIndexPage pages it’s time to take a look at how we will actually display our blog…

Creating templates for Pages

A normal Django template can be used to display each page type. Wagtail either generates automatically (by seperating underscors with capital letters in camelcase for instance BlogIndexPage -> blog_index_page) or you can use the template class attribute. Let’s add a templates foler within the tutorial foler and add another folder named tutorial inside templates and ten add a file named blog_index_page.html to templates with the following content (you must have the following hierarchy wagtailtutorial/tutorial/templates/tutorial/blog_index_page.html):

<html>
<body>
    <h1>{{ self.title }}</h1>
        Intro: {{ self.intro }}
        <hr />
        {% for rl in self.related_links.all %}
            <p>{{ rl.title }}: <a href='{{ rl.link_page.url }}'>{{ rl.link_page }}</a></p>
        {% endfor %}
    </body>
</html>

So self is the context name of the BlogPageIndex instance that is used to render this page. Beyond that, it’s normal django.
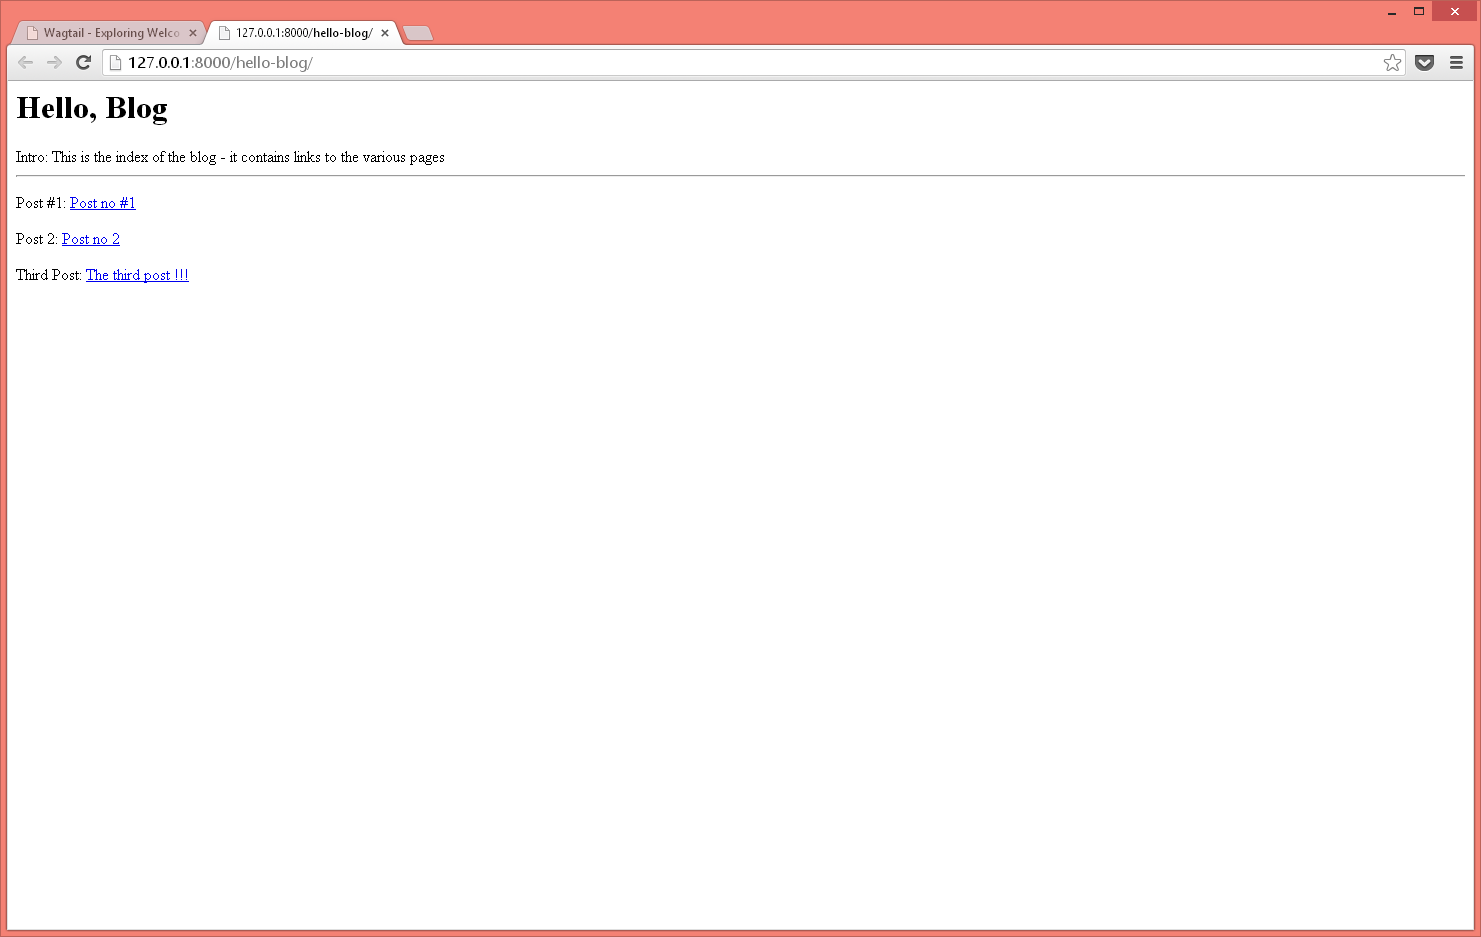
Rendering the Blog Index

Now you can view your Blog Index — however before clicking on a link to also view your posts add the template for your BlogPost (tutorial/blog_page.html):

{% load rich_text %}
<html>
<body>
    <h1>{{ self.title }}</h1>
        Date: {{ self.date }}
        {{ self.body | richtext }}
    </body>
</html>    

The extra thing here is the richtext filter which renders a RichTextField correctly. Of course the above templates are just examples - check wagtaildemo for a much better template design.

Woo-hoo — now I can totally start blogging !!! \o/

But … when I go to 127.0.0.1:8000 it displays the ugly “Welcome to your new Wagtail site!”. I don’t want to see that any more !!!

No problemo - check the next section of the tutorial :)

Changing your home page

Wagtail uses the concept of sites to define groups of pages hosted in the same server. To make more clear what site is, you have to use the good old django admin which can be found at http://127.0.0.1:8000/django-admin/. Check the localhost[default] site entry: You will see that each site has a name, a root page (currently the “Welcome to your new Wagtail site!”) and an is_default check. So, change the root page of the localhost site to your BlogIndexPage and go to http://127.0.0.1:8000/ … Yes ! The blog is alive :)

Where to go from here

You are now ready to start adding more pages to your blog, adding functionality to it (don’t forget that everything is just Django models and templates so you can change it at will), or even creating a completely different kind of site by adding other Page types. For a more complete site with lots of examples please check wagtaildemo. There is no complete documentation yet however you can

Use the source Luke!

Django dynamic forms

Introduction

To define a form in django, a developer has to create a class which extends django.forms.Form and has a number of attributes extending from django.forms.Field. This makes it very easy for the developer to create static forms, but creating dynamic forms whose fields can be changed depending on the data contributed by the users of the application is not so obvious.

Of course, some people may argue that they can do whatever they want just by spitting html input tags to their templates, however this totally violates DRY and any serious django developer would prefer to write MUMPS than creating html dynamically.

The implementation I will present here had been developed for an old project: In that project there was a number of services which could be edited dynamically by the moderators. For each service, the moderators would generate a questionnaire to get input from the users which would be defined using JSON. When the users needed to submit information for each service, a dynamic django form would be generated from this JSON and the answers would be saved to no-SQL database like MongoDB.

Describing a django form in JSON

A JSON described django form is just an array of field JSON objects. Each field object has three required attributes: name which is the keyword of the field, label which is how the label of the field and type which is the type of the input of that field. The supported types are text, textarea, integer, radio, select, checkbox. Now, depending on the type of the field, there could be also some more required attributes, for instace text has a max_length attribute and select has a choices attribute (which is an array of name/value objects). Also there are two optional attributes, required with a default value of False and help_text with a default value of ”.

As you can understand these map one by one to the corresponding attributes of the actual django form fields. An example containing a complete JSON described form is the following:

[
    {
        "name": "firstname",
        "label": "First Name",
        "type": "text",
        "max_length": 25,
        "required": 1
    },
    {
        "name": "lastname",
        "label": "Last Name",
        "type": "text",
        "max_length": 25,
        "required": 1
    },
    {
        "name": "smallcv",
        "label": "Small CV",
        "type": "textarea",
        "help_text": "Please insert a small CV"
    },
    {
        "name": "age",
        "label": "Age",
        "type": "integer",
        "max_value": 200,
        "min_value": 0
    },
    {
        "name": "marital_status",
        "label": "Marital Status",
        "type": "radio",
        "choices": [
            {"name": "Single", "value":"single"},
            {"name": "Married", "value":"married"},
            {"name": "Divorced", "value":"divorced"},
            {"name": "Widower", "value":"widower"}
        ]
    },
    {
        "name": "occupation",
        "label": "Occupation",
        "type": "select",
        "choices": [
            {"name": "Farmer", "value":"farmer"},
            {"name": "Engineer", "value":"engineer"},
            {"name": "Teacher", "value":"teacher"},
            {"name": "Office Clerk", "value":"office_clerk"},
            {"name": "Merchant", "value":"merchant"},
            {"name": "Unemployed", "value":"unemployed"},
            {"name": "Retired", "value":"retired"},
            {"name": "Other", "value":"other"}
        ]
    },
    {
        "name": "internet",
        "label": "Internet Access",
        "type": "checkbox"
    }
]

The above JSON string can be easily converted to an array of dictionaries with the following code:

import json
fields=json.loads(json_fields)

Creating the form fields

The most import part in the django dynamic form creation is to convert the above array of field-describing dictionaries to actual objects of type django.forms.Field.

To help with that I implemented a class named FieldHandler which gets an array of field dictionaries and after initialization will have an attribute named formfields which will be a dictionary with keys the names of each field an values the corresponding django.forms.Field objects. The implementation is as follows:

import django.forms

class FieldHandler():
    formfields = {}
    def __init__(self, fields):
        for field in fields:
            options = self.get_options(field)
            f = getattr(self, "create_field_for_"+field['type'] )(field, options)
            self.formfields[field['name']] = f

    def get_options(self, field):
        options = {}
        options['label'] = field['label']
        options['help_text'] = field.get("help_text", None)
        options['required'] = bool(field.get("required", 0) )
        return options

    def create_field_for_text(self, field, options):
        options['max_length'] = int(field.get("max_length", "20") )
        return django.forms.CharField(**options)

    def create_field_for_textarea(self, field, options):
        options['max_length'] = int(field.get("max_value", "9999") )
        return django.forms.CharField(widget=django.forms.Textarea, **options)

    def create_field_for_integer(self, field, options):
        options['max_value'] = int(field.get("max_value", "999999999") )
        options['min_value'] = int(field.get("min_value", "-999999999") )
        return django.forms.IntegerField(**options)

    def create_field_for_radio(self, field, options):
        options['choices'] = [ (c['value'], c['name'] ) for c in field['choices'] ]
        return django.forms.ChoiceField(widget=django.forms.RadioSelect,   **options)

    def create_field_for_select(self, field, options):
        options['choices']  = [ (c['value'], c['name'] ) for c in field['choices'] ]
        return django.forms.ChoiceField(  **options)

    def create_field_for_checkbox(self, field, options):
        return django.forms.BooleanField(widget=django.forms.CheckboxInput, **options)

As can be seen, in the __init__ method, the get_options method is called first which returns a dictionary with the common options (label, help_text, required). After that, depending on the type of each field the correct method will be generated with getattr(self, "create_field_for_"+field['type'] ) (so if type is text this will return a reference to the create_field_for_text method) and then called passing the field dictinary and the options returned from get_options. Each one of the create_field_for_xxx methods will extract the required (or optional) attributes for the specific field type, update options and initialize the correct Field passing the options as kwargs. Finally the formfields attribute will be updated with the name and Field object.

Creating the actual form

To create the actual dynamic django.forms.Form I used the function get_form which receives a string with the json description, parses it to a python array, creates the array of fields with the help of FieldHandler and then generates the Form class with type passing it django.forms.Form as a parent and the array of django.forms.Field from FieldHandler as attributes:

def get_form(jstr):
    fields=json.loads(jstr)
    fh = FieldHandler(fields)
    return type('DynaForm', (django.forms.Form,), fh.formfields )

Using the dynamic form

The result of get_form can be used as a normal form class. As an example:

import dynaform

def dform(request):
    json_form = get_json_form_from_somewhere()
    form_class = dynaform.get_form(json_form)
    data = {}
    if request.method == 'POST':
        form = form_class(request.POST)
        if form.is_valid():
            data = form.cleaned_data
    else:
        form = form_class()

    return render_to_response( "dform.html", {
        'form': form,  'data': data,
    }, RequestContext(request) )

So, we have to get our JSON form description from somewhere (for instance a field in a model) and then generate the form class with get_form. After that we follow the normal procedure of checking if the request.method is POST so we pass the POST data to the form and check if it is value or we just create an empty form. As a result we just pass the data that was read from the form to the view for presentation.

Django authority data

Introduction

One common requirement in an organization is to separate users in authorities (meaning departments / units / branches etc) and each authority have its own data. So users belonging to the “Athens Branch” won’t be able to edit data submitted from users of the “Thessaloniki Branch”.

This is a special case of the more general row-level-security in which each instance of a domain object will have an ACL. Row-level-security would need a many-to-many relation between object instances and authorities, something that would be overkill in our case.

Authority data is also a more general case of the user-data meaning that each user can have access to data that he inserts in the system. Implementing user-data is easy using the techniques we will present below.

We have to notice that the django permissions do not support our requirements since they define security for all instances of a model.

Defining authorities

In order to have custom authorities I propose first of all to add an Authority model that would define the authority. Even if your authorities only have a name I believe that adding the Authority model would be beneficial. Now, there are many ways to separate normal django users (django.contrib.auth.models.User) to authorities:

Using groups

Just define a django.contrib.auth.models.Group for each authority and add the users to the groups you want using the django-admin. Your Authority model would have an one-to-one relation with the django.contrib.auth.models.Group so you will be able to find out the other information of the authority (since django groups only have names).

Now you can just get the groups for the user and find out his authorities. This could lead to problems when users belong to django groups that are not related to authorities so you must filter these out (for instance by checking which groups actually have a corresponding Authority).

By storing the authority to the session

When the user logs in you can add an attribute to the session that would save the authority of the user. To do that, you should define a custom middleware that checks to see if there is an authority attribute to the session and if not it will do whatever it needs to find it and set it. An example is this:

class CustomAuthorityMiddleware:
  def process_request(self, request):
    if not request.session.get('authority'):
      authority = get_the_authority(request.user)
      request.session['authority']=authority

This way, whenever you want to find out the authority of the user you just check the session.

By using a Custom User Profile

Just create a django user profile and add to it a ForeignKey to your Authority model:

class Profile(models.Model):
  user = models.OneToOneField('django.auth.User')
  authority = models.ForeignKey('authorities.Authority', blank=True, null=True )

class Authority(models.Model):
  id = models.IntegerField(primary_key = True)
  name = models.CharField(max_length=64, )
  auth_type = models.CharField(max_length=16, )

You can get the authority of the user through request.user.profile.authority.

Getting the authority of the user has to be DRY

Whatever method you use to define the authorities of your users you have to remember that it is very important to define somewhere a function that will return the authority (or authorities) of a user. You need to define a function even in the simple case in which your function would just return request.user.profile.authority. This will greatly help you when you wish to add some logic to this, for instance “quickly disable users belonging to Authority X or temporary move users from Authority Y to authority Z”.

Let us suppose that you have defined a get_user_authority function. Also, you need to define a has_access function that would decide if a users/request has access to a particular object. This also needs to be DRY.

Adding authority data

To define authority data you have to add a field to your model that would define its authority, for instance like this:

class AuthorityData(models.Model):
  authority = models.ForeignKey('authorities.Authority', editable=False,)

This field should not be editable (at least by your end users) because they shouldn’t be able to change the authority of the data they insert.

If you want to have user-data then just add a models.ForeignKey('django.auth.User', editable=False)

Now, your Create and Update Class Based Views have to pass the request to your forms and also your Detail and Update CBV should allow only getting objects that belong to the authority of the user:

class AuthorityDataCreateView(CreateView):
  model=models.AuthorityData

  def get_form_kwargs(self):
      kwargs = super(AuthorityDataCreateView, self).get_form_kwargs()
      kwargs.update({'request': self.request})
      return kwargs

class AuthorityDataDetailView(DetailView):
  def get_object(self, queryset=None):
      obj = super(AuthorityDataDetailView, self).get_object(queryset)
      if if not user_has_access(obj, self.request):
          raise Http404(u"Access Denied")
      return obj

class AuthorityDataUpdateView(UpdateView):
  model=models.AuthorityData

  def get_form_kwargs(self):
      kwargs = super(AuthorityDataUpdateView, self).get_form_kwargs()
      kwargs.update({'request': self.request})
      return kwargs

  def get_object(self, queryset=None):
      obj = super(AuthorityDataUpdateView, self).get_object(queryset)
      if if not user_has_access(obj, self.request):
          raise Http404(u"Access Denied")
      return obj

Your ModelForm can now use the request to get the Authority and set it (don’t forget that you should not use Meta.exclude but instead use Meta.include!):

class AuthorityDataModelForm(forms.ModelForm):
    class Meta:
      model = models.AuthorityData
      exclude = ('authority',)

    def __init__(self, *args, **kwargs):
      self.request = kwargs.pop('request', None)
      super(ActionModelForm, self).__init__(*args, **kwargs)


    def save(self, force_insert=False, force_update=False, commit=True):
      obj = super(AuthorityDataModelForm, self).save(commit=False)
      if obj:
          obj.authority = get_user_authority(self.request)
          obj.save()
      return obj

The previous work fine for Create/Detail/Update CBVs but not for ListsViews. List views querysets and in general all queries to the object have to be filtered through authority.

class AuthorityDataListView(ListView):
  def get_queryset(self):
    queryset = super(AuthorityDataModelForm, self).get_queryset()
    return queryset.filter(authority = get_user_authority(request))

Conclusion

Using the above techniques we can define authority (or just user) data. Your AuthorityData should have a ForeignKey to your Authority and you have configure your queries, ModelForms and CBVs to use that. If you have more than one models that belong to an authority and want to stay DRY then you’d need to define all the above as mixins.

Using custom authorities with spring-security LDAP authentication

Introduction

One very useful component of the spring java framework is spring-security since it allows consistent usage of various security providers for authentication and authorization. Although I’ve found a great number of basic spring-security tutorials on the internet, I wasn’t able to find a complete solution for my own requirements:

Logging in with LDAP but configuring the authorities [*] of the logged in user with the help of a custom method and not through LDAP.

I think that the above is a common requirement in many organizations: There is a central LDAP repository in which the usernames and passwords of the users are stored, but the groups of the users are not stored there. Or maybe the groups that are actually stored in the LDAP cannot be transformed easily to application specific groups for each application.

You may find the working spring project that uses ldap and a custom groups populator here: https://github.com/spapas/SpringLdapCustomAuthorities/

A basic spring security setup

I’ve created a very basic setup for spring-security for a spring-mvc project. Please take a look here for a more thorough explanation of a simple spring-security project http://www.mkyong.com/spring-security/spring-security-hello-world-example/ and here http://www.codeproject.com/Articles/253901/Getting-Started-Spring-Security for a great explanation of the various spring-security classes.

In my setup there is a controller that defines two mappings, the “/” which is the homepage that has a link to the “/enter” and the “/enter” which is an internal page in which only authorized users have access. When the user clicks on “enter” he will be represented with a login form first. If the use logs in successfully, the enter.jsp will list the username and the authorities of the logged in user through the following spring-security tags:

<%@ taglib prefix="sec" uri="http://www.springframework.org/security/tags" %>
[...]
Username: <sec:authentication property="principal.username" /><br />
Authorities: <sec:authentication property="principal.authorities"/><br />

The authentication provider is an in memory service in which the username, password and authorities of each user are defined in the XML. So this is a simple spring-security example that can be found in a number of places on the internet. The security rules, login form and the authentication provider are configured with the following security-config.xml:

<beans:beans xmlns="http://www.springframework.org/schema/security"
   xmlns:beans="http://www.springframework.org/schema/beans"
   xmlns:xsi="http://www.w3.org/2001/XMLSchema-instance"
   xsi:schemaLocation="http://www.springframework.org/schema/beans
                   http://www.springframework.org/schema/beans/spring-beans-3.1.xsd
                   http://www.springframework.org/schema/security
                   http://www.springframework.org/schema/security/spring-security-3.1.xsd">

   <http pattern="/static/**" security="none" />

   <http use-expressions="true">
       <intercept-url pattern="/" access="permitAll" />
       <intercept-url pattern="/enter" access="hasRole('user')" />
       <intercept-url pattern="/**" access="denyAll" />
       <form-login default-target-url="/" />
       <logout  logout-success-url="/" />
   </http>

   <authentication-manager>
       <authentication-provider>
           <user-service>
               <user name="spapas" password="123" authorities="admin, user, nonldap" />
               <user name="serafeim" password="123" authorities="user" />
           </user-service>
       </authentication-provider>
   </authentication-manager>

</beans:beans>

When we run this application and go to the /enter, we will get the following output:

Username: spapas

Authorities: [admin, nonldap, user]

Spring security LDAP with custom authorities

The previous application can be modified to login through LDAP and get the authorities from a custom class. The main differences are in the pom.xml which adsd the spring-security-ldap dependency, the addition of a CustomLdapAuthoritiesPopulator.java which does the actual mapping of username to authority and various changes to the security-config.xml.

As you will see we had to define our security beans mainly using spring beans and not using the various elements from security namespace like <ldap-server> and <ldap-authentication-provder>. For a good tutorial on using these elements and ldap in spring security in general check these out: http://docs.spring.io/spring-security/site/docs/3.1.x/reference/ldap.html and http://krams915.blogspot.gr/2011/01/spring-security-mvc-using-ldap.html.

<beans:beans xmlns="http://www.springframework.org/schema/security"
   xmlns:beans="http://www.springframework.org/schema/beans"
   xmlns:xsi="http://www.w3.org/2001/XMLSchema-instance"
   xsi:schemaLocation="http://www.springframework.org/schema/beans
                   http://www.springframework.org/schema/beans/spring-beans-3.1.xsd
                   http://www.springframework.org/schema/security
                   http://www.springframework.org/schema/security/spring-security-3.1.xsd">

   <http pattern="/static/**" security="none" />

   <http use-expressions="true" >
     <intercept-url pattern="/" access="permitAll" />
     <intercept-url pattern="/enter" access="hasRole('user')" />
     <intercept-url pattern="/**" access="denyAll" />
     <form-login default-target-url="/" />
     <logout  logout-success-url="/" />
   </http>

   <beans:bean id="contextSource"
         class="org.springframework.security.ldap.DefaultSpringSecurityContextSource">
     <beans:constructor-arg value="ldap://login.serafeim.gr:389/dc=serafeim,dc=gr"/>
     <beans:property name="anonymousReadOnly" value="true"/>
   </beans:bean>

   <beans:bean
         id="userSearch"
         class="org.springframework.security.ldap.search.FilterBasedLdapUserSearch">
     <beans:constructor-arg index="0" value=""/>
     <beans:constructor-arg index="1" value="(uid={0})"/>
     <beans:constructor-arg index="2" ref="contextSource" />
   </beans:bean>

   <beans:bean
         id="ldapAuthProvider"
         class="org.springframework.security.ldap.authentication.LdapAuthenticationProvider">
     <beans:constructor-arg>
       <beans:bean class="org.springframework.security.ldap.authentication.BindAuthenticator">
         <beans:constructor-arg ref="contextSource"/>
         <beans:property name="userSearch" ref="userSearch" />
         <!--
         <beans:property name="userDnPatterns">
           <beans:list><beans:value>uid={0},ou=People</beans:value></beans:list>
         </beans:property>
         -->
       </beans:bean>
     </beans:constructor-arg>
     <beans:constructor-arg>
       <beans:bean class="gr.serafeim.springldapcustom.CustomLdapAuthoritiesPopulator" />
     </beans:constructor-arg>
   </beans:bean>

   <authentication-manager>
     <authentication-provider ref="ldapAuthProvider" />
   </authentication-manager>

</beans:beans>

So, in the above configuration we’ve defined three spring beans: contextSource, userSearch and ldapAuthProvider. The <authentication-manager> element uses the ldapAuthProvider as an authentication provider. Below we will explain these beans:

contextSource

The contextSource bean defines the actual LDAP server that we are going to connect to. It has the class o.s.s.ldap.DefaultSpringSecurityContextSource. This will need to be passed to other beans that would need to connect to the server for a number of operations. We pass to it the url of our LDAP server and set its anonymousReadOnly property to true. The anonymousReadOnly defines if we can anonymously connect to our LDAP server in order to perform the search operation below. If we cannot connect anonymously then we have to set its userDn and password properties.

A very interesting question is if the <ldap-server> element of the spring security namespace is related to the o.s.s.ldap.DefaultSpringSecurityContextSource like our contextSource. To find out, we need to check the o.s.s.config.SecurityNamespaceHandler class of the spring-security-config.jar. In there we see the loadParsers method which has the line: parsers.put(Elements.LDAP_SERVER, new LdapServerBeanDefinitionParser());. The constant o.s.s.config.Elements.LDAP_SERVER has the value of "ldap-server" as expected, so we need to see what does the class o.s.s.config.ldap.LdapServerBeanDefinitionParser do. This class has a parse() method that receives the xml that was used to instantiate the <ldap-server> element and, depending an on the actualy configuration, instantiates a bean of the class o.s.s.ldap.DefaultSpringSecurityContextSource with an id of o.s.s.securityContextSource that will be used by the other elements in the security namespace !

This actually solves another question I had concerning the following error:

No bean named ‘org.springframework.security.authenticationManager’ is defined: Did you forget to add a gobal <authentication-manager> element to your configuration (with child <authentication-provider> elements)? Alternatively you can use the authentication-manager-ref attribute on your <http> and <global-method-security> elements.

What happens is that when spring-security-configuration encounters an <authentication-manager> it will instantiate a bean named o.s.s.authenticationManager having the class o.s.s.authentication.ProviderManager and will create and pass to it a providers list with all the authentication providers that are defined inside the <authentication-manager> element with <authentication-provider> nodes. So, if you encounter the above error, the problem is that for some reason your <authentication-manager> is not configured correctly, so no o.s.s.authenticatioManager bean is created!

userSearch

The userSearch bean is needed if we don’t know exactly where our users are stored in the LDAP directory so we will use this bean as a search filter. If we do know our user tree then we won’t need this bean at all as will be explained later. It has the class o.s.s.ldap.search.FilterBasedLdapUserSearch and gets three constructor parameters: searchBase, searchFilter and contextSource. The searchBase is from where in the LDAP tree to start searching (empty in our case), the searchFilter defines where is the username (uid in our case) and the contextSource has been defined before.

ldapAuthProvider

This is the actual authentication-provider that the spring-security authentication-manager is going to use. It is an instance of class o.s.s.ldap.authentication.LdapAuthenticationProvider which has two main properties: An o.s.s.ldap.authentication.LdapAuthenticator implementation and an o.s.s.ldap.userdetails.LdapAuthoritiesPopulator implementation. The first interface defines an authenticate method and is used to actually authenticate the user with the LDAP server. The second interface defines a getGrantedAuthorities which returns the roles for the authenticated user. The LdapAuthoritiesPopulator parameter is actually optional (so we can use LDAP to authenticate only the users) and we can provide our own implementation to have custom authorities for our application. That is exactly what we’ve done here.

The two arguments used to initialize the ldapAuthProvoder are one instance of o.s.s.ldap.authentication.BindAuthenticator which is a simple authenticator that tries to bind with the given credentials to the LDAP server to check the credentials and one instance of a custom class named g.s.s.CustomLdapAuthoritiesPopulator which is the actual implementation of the custom roles provider. The BindAuthenticator gets the contextSource as a constructor parameter and its userSearch property is set with the userSearch bean defined previously. If we instead knew the actual place of the users, we could use the commented out userDnPatterns property which takes a list of possible places in the LDAP catalog which will be checked for the username.

CustomLdapAuthoritiesPopulator

The CustomLdapAuthoritiesPopulator just needs to implement the LdapAuthoritiesPopulator interface. Here’s our implmentation:

package gr.serafeim.springldapcustom;

import java.util.Collection;
import java.util.HashSet;
import org.springframework.ldap.core.DirContextOperations;
import org.springframework.security.core.GrantedAuthority;
import org.springframework.security.core.authority.SimpleGrantedAuthority;
import org.springframework.security.ldap.userdetails.LdapAuthoritiesPopulator;
import org.springframework.stereotype.Component;

@Component
public class CustomLdapAuthoritiesPopulator implements LdapAuthoritiesPopulator {
       @Override
       public Collection<? extends GrantedAuthority> getGrantedAuthorities(
                       DirContextOperations userData, String username) {
               Collection<GrantedAuthority> gas = new HashSet<GrantedAuthority>();
               if(username.equals("spapas")) {
                       gas.add(new SimpleGrantedAuthority("admin"));
               }
               gas.add(new SimpleGrantedAuthority("user"));
               return gas;
       }
}

The getGrantedAuthorities just checks the username and add another role if it is a specific one. Of course here we would autowire our user roles repository and query the database to get the roles of the user, however I’m not going to do that for the case of simplicity.

Example

When we run this application and go to the /enter, after logging in with our LDAP credentials as spapas, we will get the following output:

Username: spapas

Authorities: [admin, user]

Conclusion

In the previous a complete example of configuring a custom authorities populator was represented. Using this configuration we can login through the LDAP server of our organization but use application specific roles for our logged-in users.

[*]Which is how spring calls the groups/roles the user belongs to

git branches

Introduction

A branch is a very interesting git feature. With this you may have more than one branches in the same repository. The main usage of this feature would be to create different versions of your source code to parallel test development of different features. When the development of each of these features has been finished then the different versions would need to be combined (or merged) to a single version. Of course, merging is not always the result of branching - some branches may exist indefinitely or other may just be deleted without merging.

I will try to experiment with it and comment on the results.

Creating a new git repository

Let’s start by creating a new git repository:

D:\>mkdir testgit
D:\>cd testgit
D:\testgit>echo contents 11 > file1.txt
D:\testgit>echo contents 222 > file2.txt
D:\testgit>echo 3333 > file2.txt
D:\testgit>copy con file3.txt
line 1 of file 3

line 3 of file 3

test

line 7 of file 3
^Z
       1 files copied.

D:\testgit>git init
Initialized empty Git repository in D:/testgit/.git/
D:\testgit>git add .
D:\testgit>git commit -m Initial
[master (root-commit) 96ca9af] Initial
 3 files changed, 9 insertions(+)
 create mode 100644 file1.txt
 create mode 100644 file2.txt
 create mode 100644 file3.txt

To see the branch we are in we can use the git branch command. Also git status outputs the current branch:

D:\testgit>git status
# On branch master
nothing to commit, working directory clean
D:\testgit>git branch
* master

So, it seems that when we create a new repository, a “master” branch is created.

Branching

Lets create a new branch and change our working branch to it:

D:\testgit>git branch slave
D:\testgit>git branch
* master
  slave
D:\testgit>git checkout slave
Switched to branch 'slave'
D:\testgit>git branch
  master
* slave

We can see that now the slave branch is the current one. Let’s do some changes and add commit them to the slave branch:

D:\testgit>git branch
  master
* slave
D:\testgit>echo new file1 contents > file1.txt
D:\testgit>git commit -m "Slave modification"
[slave b6083ad] Slave modification
 1 file changed, 1 insertion(+), 1 deletion(-)
D:\testgit>git checkout master
Switched to branch 'master'
D:\testgit>more file1.txt
contents 11
D:\testgit>git checkout slave
Switched to branch 'slave'
D:\testgit>more file1.txt
new file1 contents

So the contents of file1.txt in the branch master is contents 11 while the contents of the same file in the branch slave is new file1 contents.

An interested behaviour is what happens with uncommit changes when changing branches. Let’s try deleting a file:

D:\testgit>del file2.txt
D:\testgit>git status
# On branch master
# Changes not staged for commit:
#   (use "git add/rm <file>..." to update what will be committed)
#   (use "git checkout -- <file>..." to discard changes in working directory)
#
#       deleted:    file2.txt
#
no changes added to commit (use "git add" and/or "git commit -a")
D:\testgit>git checkout slave
D       file2.txt
Switched to branch 'slave'
D:\testgit>git status
# On branch slave
# Changes not staged for commit:
#   (use "git add/rm <file>..." to update what will be committed)
#   (use "git checkout -- <file>..." to discard changes in working directory)
#
#       deleted:    file2.txt
#
no changes added to commit (use "git add" and/or "git commit -a")
D:\testgit>git add -A
D:\testgit>git status
# On branch slave
# Changes to be committed:
#   (use "git reset HEAD <file>..." to unstage)
#
#       deleted:    file2.txt
#
D:\testgit>git checkout master
D       file2.txt
Switched to branch 'master'
D:\testgit>git status
# On branch master
# Changes to be committed:
#   (use "git reset HEAD <file>..." to unstage)
#
#       deleted:    file2.txt
#

So, our changes are not correlated with a branch until we commit them! Let’s commit them to the master repository and confirm that:

D:\testgit>git commit -m "Deleted file2.txt"
[master 6f8749d] Deleted file2.txt
 1 file changed, 1 deletion(-)
 delete mode 100644 file2.txt
D:\testgit>git status
# On branch master
nothing to commit, working directory clean
D:\testgit>dir file2.txt
[...]
File not found
D:\testgit>git checkout slave
Switched to branch 'slave'
D:\testgit>git status
# On branch slave
nothing to commit, working directory clean
D:\testgit>dir file2.txt
[...]
08/10/2013  05:59 pm                15 file2.txt

This is interesting… Let’s try modifying the file2.txt (which does not exist to the master branch):

D:\testgit>git branch
  master
* slave
D:\testgit>echo new file2 contents > file2.txt
D:\testgit>git add .
D:\testgit>git status
# On branch slave
# Changes to be committed:
#   (use "git reset HEAD <file>..." to unstage)
#
#       modified:   file2.txt
#
D:\testgit>git checkout master
error: Your local changes to the following files would be overwritten by checkout:
       file2.txt
Please, commit your changes or stash them before you can switch branches.
Aborting

We won’t be able to change the current branch until we commit the conflicting change:

D:\testgit>git commit -m "Modified file2"
[slave b5af832] Modified file2
 1 file changed, 1 insertion(+), 1 deletion(-)
D:\testgit>git checkout master
Switched to branch 'master'

Remote branches

For each local repository you can define a number of remote repositories, or remotes as git calls them. When you clone a repository from github.com, your local repository will have one remote, named origin. We will try to add the same remote by hand. Let’s suppose that we have created a repository in github.com named testgit. After that we wil issue:

D:\testgit>git remote
D:\testgit>git remote add origin https://github.com/spapas/testgit.git
D:\testgit>git remote
origin

So no we have one remote named origin that is linked with https://github.com/spapas/testgit.git. Let’s try to push our master branch to the origin remote:

D:\testgit>git push origin master
Username for 'https://github.com': spapas
Password for 'https://spapas@github.com':
Counting objects: 7, done.
Delta compression using up to 4 threads.
Compressing objects: 100% (5/5), done.
Writing objects: 100% (7/7), 531 bytes, done.
Total 7 (delta 1), reused 0 (delta 0)
To https://github.com/spapas/testgit.git
 * [new branch]      master -> master
D:\testgit>git branch -r
  master
* slave
  remote/origin/master

We see now that we have three branches. Two local (master slave) and one remote (origin/master). We will also add the slave remote (origin/slave):

D:\testgit>git branch -r
  origin/master
  origin/slave

Let’s do a change to our local repository and then push them to the remote:

D:\testgit>notepad file3.txt
D:\testgit>git add .
D:\testgit>git status
# On branch slave
# Changes to be committed:
#   (use "git reset HEAD <file>..." to unstage)
#
#       modified:   file3.txt
#
D:\testgit>git commit -m "Changed file3.txt"
[slave ce3b7b9] Changed file3.txt
 1 file changed, 1 insertion(+), 1 deletion(-)
D:\testgit>git push origin slave
Username for 'https://github.com': spapas
Password for 'https://spapas@github.com':
Counting objects: 5, done.
Delta compression using up to 4 threads.
Compressing objects: 100% (3/3), done.
Writing objects: 100% (3/3), 299 bytes, done.
Total 3 (delta 1), reused 0 (delta 0)
To https://github.com/spapas/testgit.git
   b5af832..ce3b7b9  slave -> slave

Everything works as expected. The final thing to test is to try checking out a remote branch:

D:\testgit>git checkout master
Switched to branch 'master'
D:\testgit>echo new new file1 > file1.txt
D:\testgit>more file1.txt
 new new file1
D:\testgit>git checkout origin/master
M       file1.txt
Note: checking out 'origin/master'.

You are in 'detached HEAD' state. You can look around, make experimental
changes and commit them, and you can discard any commits you make in this
state without impacting any branches by performing another checkout.

If you want to create a new branch to retain commits you create, you may
do so (now or later) by using -b with the checkout command again. Example:

  git checkout -b new_branch_name

HEAD is now at 6f8749d... Deleted file2.txt
D:\testgit>git status
# Not currently on any branch.
# Changes not staged for commit:
#   (use "git add <file>..." to update what will be committed)
#   (use "git checkout -- <file>..." to discard changes in working directory)
#
#       modified:   file1.txt
#
no changes added to commit (use "git add" and/or "git commit -a")
D:\testgit>more file1.txt
new new file1

So, it seems that when we check out the remote branch, we won’t have any local branches, however the change we did to the file1.txt is transfered just like when switching from one local repository to another. We can then add the changes and commit:

D:\testgit>git add .
D:\testgit>git commit
[detached HEAD 506674c] foo
 1 file changed, 1 insertion(+), 1 deletion(-)
 D:\testgit>git status
# Not currently on any branch.
nothing to commit, working directory clean
D:\testgit>git branch
* (no branch)
  master
  slave

So we are working with an unnamed branch! We have to name it to be able to work without problems:

D:\testgit>git checkout -b named_branch
Switched to a new branch 'named_branch'
D:\testgit>git branch
  master
* named_branch
  slave

Finally we may push again the named_branch to our remote origin.